


How to Replace Front Brake Pads on Your Yamaha YZF-R3: A Step-by-Step Guide
Replacing the front brake pads on your Yamaha YZF-R3 is a crucial maintenance task that ensures your motorcycle’s braking performance and safety. Here’s a detailed guide to help you through the process.
Preparing for the Job
Before you start, it’s essential to prepare yourself and your workspace. Here are a few things you need to consider:
Also to read : Unlocking peak performance: the ultimate guide to optimizing the air-fuel ratio for your kawasaki vulcan 900 custom
Gather Necessary Tools and Materials
- A set of new front brake pads compatible with your Yamaha YZF-R3
- Brake fluid (if you need to top it off or replace it)
- Clean rags
- Safety gloves
- A torque wrench
- A C-clamp or brake pad spreader
- A screwdriver or Allen wrench (depending on the type of caliper bolts)
Choose a Safe Workspace
- Find a level and stable surface to park your motorcycle.
- Ensure the area is clean and free from any debris that could interfere with your work.
- Use a center stand or paddock stand to lift the front wheel off the ground.
Consult Your Manual
- Always refer to your Yamaha YZF-R3 service manual for specific instructions and recommendations.
- Understand the brake system components and their functions to avoid any confusion during the process.
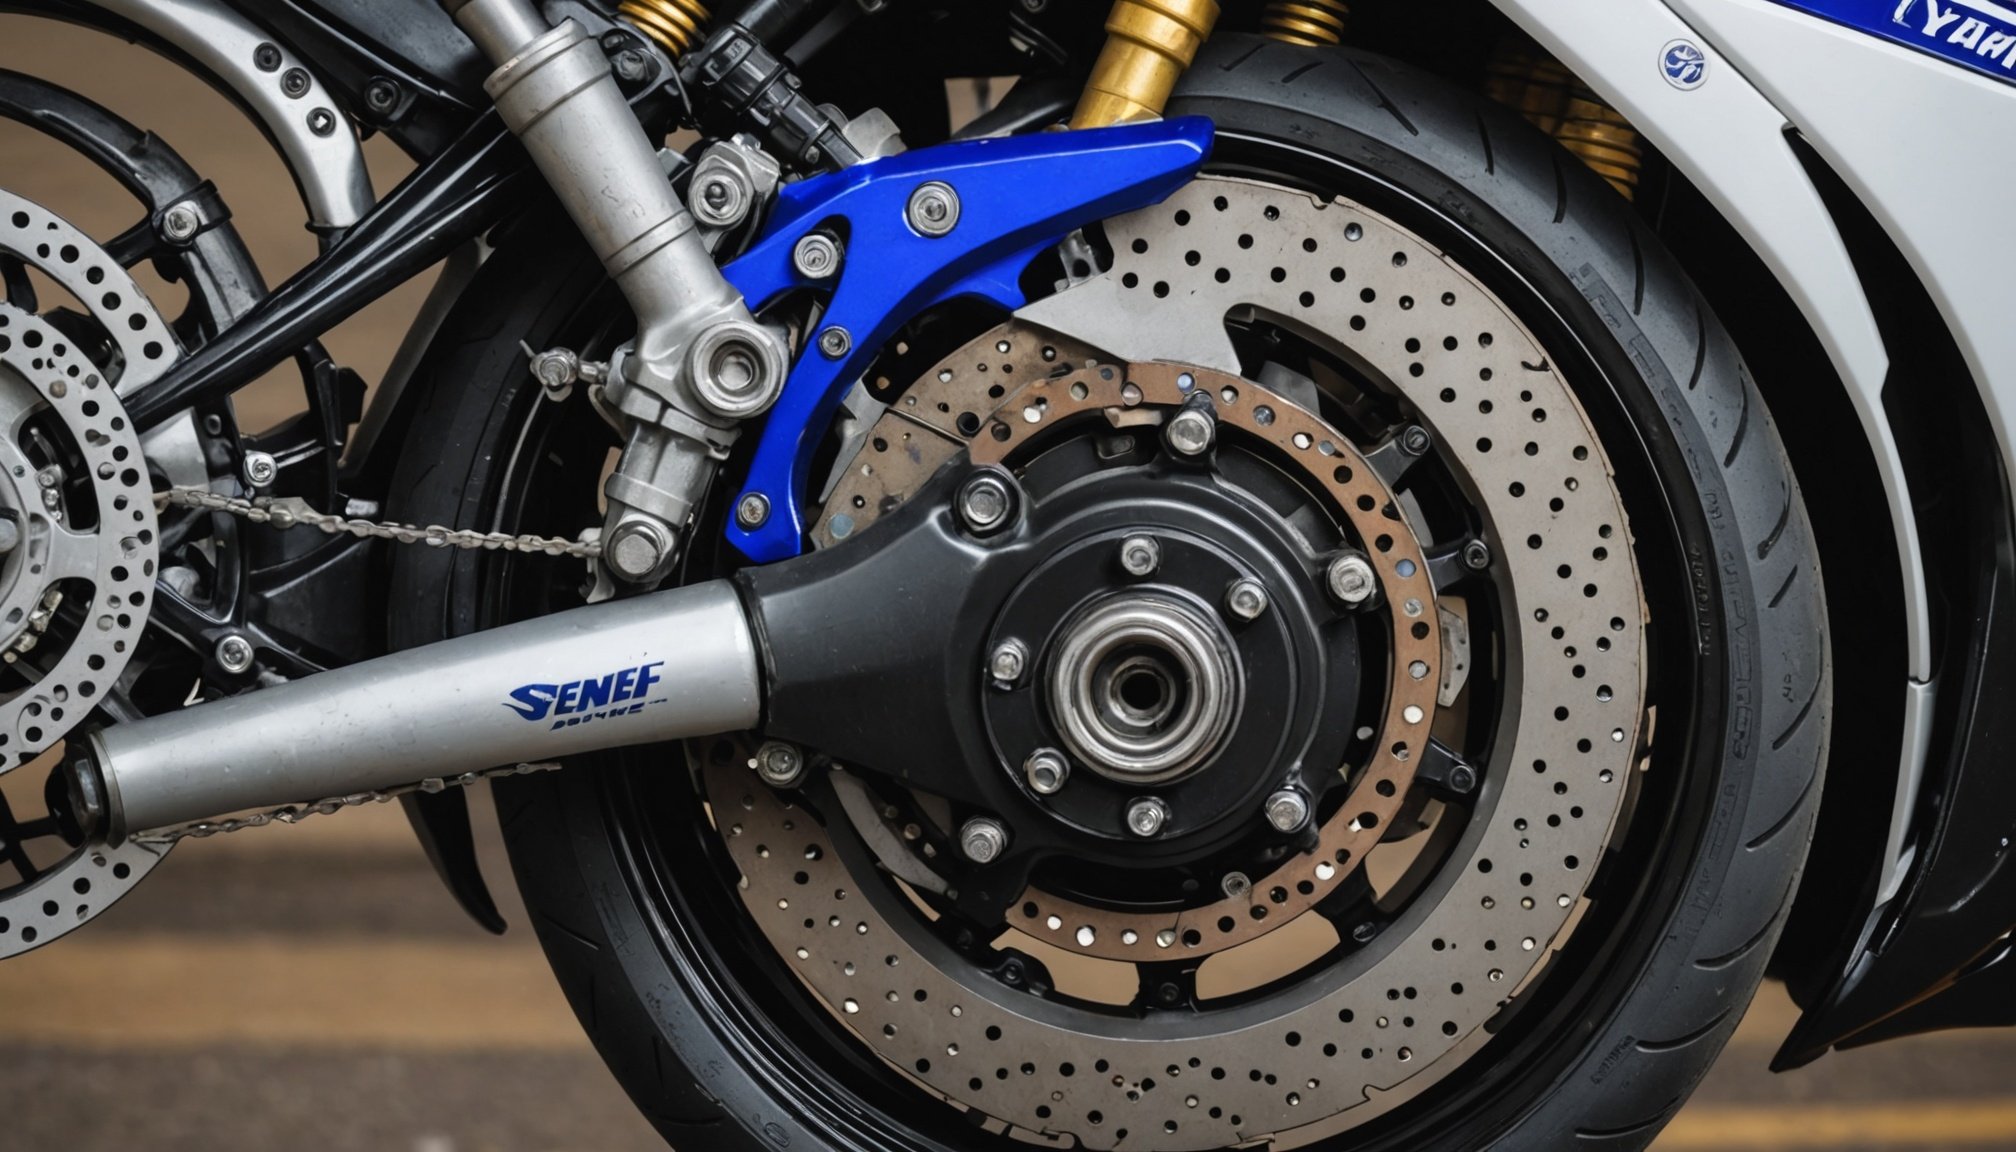
Step 1: Remove the Front Wheel
To access the brake caliper and pads, you need to remove the front wheel.
Loosen the Axle Nut
- Before you jack up the motorcycle, loosen the axle nut using a wrench. Do not remove it yet.
Jack Up the Motorcycle
- Use a center stand or paddock stand to lift the front wheel off the ground. Make sure the motorcycle is securely supported.
Remove the Axle Nut and Wheel
- Completely remove the axle nut and slide the wheel off the fork.
- Set the wheel aside in a safe place.
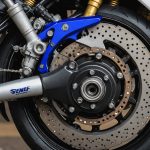
Step 2: Remove the Caliper
The next step is to remove the caliper to access the brake pads.
Also read : Step-by-Step Guide to Fine-Tuning Chain Tension on Your Yamaha YZF-R1
Loosen the Caliper Bolts
- Use a screwdriver or Allen wrench to loosen the caliper bolts. These bolts hold the caliper in place over the rotor.
- Be careful not to remove the bolts yet; just loosen them enough to slide the caliper off.
Slide the Caliper Off
- Gently slide the caliper off the rotor. Be careful not to damage the brake hose.
- Use a piece of wire or a rubber band to hang the caliper from the fork, ensuring it does not stretch or damage the brake hose.
Step 3: Remove the Old Brake Pads
Now, you can remove the old brake pads from the caliper.
Locate the Pad Retaining Clips
- Look for the clips or springs that hold the brake pads in place within the caliper.
- Use a screwdriver or pliers to remove these clips.
Pull Out the Old Pads
- Gently pull out the old brake pads from the caliper.
- Take note of the pad wear sensor wire if your model is equipped with one.
Step 4: Install the New Brake Pads
Installing the new brake pads is a straightforward process.
Insert the New Pads
- Place the new brake pads into the caliper, ensuring they are properly seated and aligned.
- Make sure the pad wear sensor wire is correctly connected if applicable.
Replace the Pad Retaining Clips
- Put back the clips or springs that hold the brake pads in place.
- Ensure they are securely fastened.
Step 5: Reinstall the Caliper
Now it’s time to put everything back together.
Slide the Caliper Back Over the Rotor
- Carefully slide the caliper back over the rotor, ensuring it is properly aligned.
- Make sure the brake hose is not twisted or pinched.
Tighten the Caliper Bolts
- Tighten the caliper bolts in a star pattern to avoid warping the caliper.
- Refer to your service manual for the correct torque specification.
Step 6: Reinstall the Front Wheel
With the caliper and new brake pads in place, you can now reinstall the front wheel.
Place the Wheel Back On
- Slide the wheel back onto the fork and hand-tighten the axle nut.
Lower the Motorcycle
- Carefully lower the motorcycle to the ground using the center stand or paddock stand.
Tighten the Axle Nut
- Tighten the axle nut in a star pattern to the specified torque.
Step 7: Check and Bleed the Brakes (If Necessary)
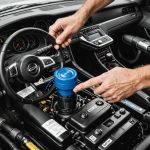
After replacing the brake pads, it’s crucial to check the brake fluid level and bleed the brakes if necessary.
Check the Brake Fluid Level
- Refer to your service manual to locate the brake fluid reservoir.
- Check the level and top it off if necessary.
Bleed the Brakes
- If you notice any air in the brake lines or if the brake lever feels spongy, you may need to bleed the brakes.
- Use a brake bleeding kit and follow the instructions provided with the kit or in your service manual.
### Brake Bleeding Signs
- Spongy or unresponsive brake lever
- Reduced braking power
- Air in the brake lines

### Brake Fluid Check
- Check every 1,000 miles or at least once a month
- Replace every two years or as specified by the manufacturer
Step 8: Test the Brakes
The final step is to test the brakes to ensure they are functioning properly.
Test the Brakes
- Take your motorcycle for a slow ride to test the brakes.
- Apply gentle pressure to the brake lever and check for any unusual noises or vibrations.
- Gradually increase the braking pressure to ensure the brakes are working as expected.
Additional Tips and Considerations
Regular Maintenance
- Regularly check your brake pads for wear to avoid unexpected failures.
- “Your brakes are your primary safety system – they allow you to stop quickly and avoid potential hazards,” as emphasized by Honda’s motorcycle maintenance guide[3].
Use the Right Tools
- Always use the correct tools to avoid damaging the brake components.
- A C-clamp or brake pad spreader can be very useful in compressing the caliper pistons.
Keep Your Workspace Clean
- Ensure your workspace is clean and free from debris to prevent any contamination of the brake components.
Replacing the front brake pads on your Yamaha YZF-R3 is a manageable task if you follow the steps outlined above. Here is a summary of the key points:
### Key Steps Summary
- Remove the front wheel
- Remove the caliper
- Remove the old brake pads
- Install the new brake pads
- Reinstall the caliper
- Reinstall the front wheel
- Check and bleed the brakes (if necessary)
- Test the brakes

### Important Checks
- Brake fluid level
- Brake pad wear
- Brake hose condition
- Caliper bolts torque specification
By following these steps and tips, you can ensure your motorcycle’s braking performance remains optimal, enhancing both safety and riding experience.
Practical Insights and Actionable Advice
- Always refer to your service manual for specific instructions and recommendations tailored to your Yamaha YZF-R3 model.
- Use high-quality brake pads that are compatible with your motorcycle to ensure optimal performance.
- Regularly inspect your brakes to catch any issues before they become major problems.
- Consider seeking professional help if you are not comfortable with the process or if you encounter any complications.
Replacing your front brake pads is just one part of maintaining your motorcycle. By staying on top of regular maintenance, you can enjoy a safer and more enjoyable riding experience.